【注意】最后更新于 March 5, 2018,文中内容可能已过时,请谨慎使用。
记录几个修改,方便以后升级主题后更新。
目前 next 版本:6.0.5 。
文章加密
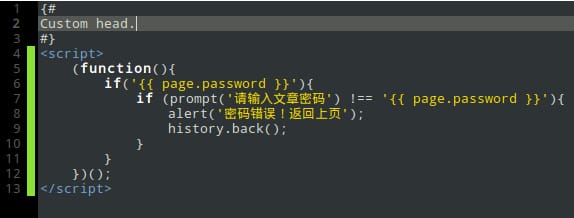
打开themes->next->layout->_custom->head.swig文件(默认路径)插入 JS 脚本:
 1
 2
 3
 4
 5
 6
 7
 8
 9
10
|
<script>
    (function(){
        if('{ { page.password } }'){
            if (prompt('请输入文章密码') !== '{ { page.password } }'){
                alert('密码错误!返回上页');
                history.back();
            }
        }
    })();
</script>
|

使用:
1
2
3
4
5
6
|
---
title:
date: 2018-03-05 19:37:08
top: #顶置
password: #密码
---
|
没什么卵用,查看源码一切都暴露了。
添加 DaoVoice
打开themes->next->layout->_custom->head.swig文件(默认路径)插入 JS:
1
2
3
4
5
6
7
8
9
|
{% if theme.daovoice %}
  <script>
  (function(i,s,o,g,r,a,m){i["DaoVoiceObject"]=r;i[r]=i[r]||function(){(i[r].q=i[r].q||[]).push(arguments)},i[r].l=1*new Date();a=s.createElement(o),m=s.getElementsByTagName(o)[0];a.async=1;a.src=g;a.charset="utf-8";m.parentNode.insertBefore(a,m)})(window,document,"script",('https:' == document.location.protocol ? 'https:' : 'http:') + "//widget.daovoice.io/widget/0f81ff2f.js","daovoice")
  daovoice('init', {
      app_id: "{ {theme.daovoice_app_id} }"
    });
  daovoice('update');
  </script>
{% endif %}
|
首先在 daovoice 注册账号,邀请码是0f81ff2f,注册完成后会得到一个 app_id :
1
2
3
|
# Online contact
daovoice: true
daovoice_app_id: "刚才获得的 app_id"
|
自定义 css
打开themes/next/source/css/_custom/custom.styl :
 1
 2
 3
 4
 5
 6
 7
 8
 9
10
11
12
13
14
15
16
17
18
19
20
21
22
23
24
25
26
27
28
29
30
31
32
33
34
35
36
37
38
39
40
41
42
43
44
45
46
47
48
49
50
51
52
53
54
55
56
57
58
59
|
// Custom styles.
// 主页文章添加阴影效果 (不利于移动端)
/* .post {
   margin-top: 60px;
   margin-bottom: 60px;
   padding: 15px;
   -webkit-box-shadow: 0 0 5px rgba(202, 203, 203, .5);
   -moz-box-shadow: 0 0 5px rgba(202, 203, 204, .5);
  }
*/
// 鼠标样式
* {
  cursor: url('/images/sword2.ico'), auto !important;
}
:active {
  cursor: url('/images/sword1.ico'), auto !important;
}

// DaoVoice 图标透明
.daodream-launcher-button,
.daodream-launcher-maximized,
.daodream-launcher-with-initials {
  opacity: 0.3;
  -moz-opacity: 0.3;
  opacity: 0.3;
}
#daodream-launcher {
  opacity: 0.1;
  -moz-opacity: 0.1;
  opacity: 0.1;
}
div.daodream-launcher-preview {
  opacity: 0.9 !important;
  -moz-opacity: 0.9 !important;
  opacity: 0.9 !important;
}
#daodream-launcher:hover {
  opacity: 0.9 !important;
  -moz-opacity: 0.9 !important;
  opacity: 0.9 !important;
}
.daodream-launcher-button:hover,
.daodream-launcher-maximized:hover,
.daodream-launcher-with-initials:hover {
  opacity: 0.9 !important;
  -moz-opacity: 0.9 !important;
  opacity: 0.9 !important;
}
// Valine 和 algolia 和 DaoDream 去除 Powered By
div.info,
span.algolia-powered,
div.daodream-powered-by {
  visibility: hidden !important;
  height: 0 !important;
}
div.txt-right {
  visibility: hidden !important;
  height: 0 !important;
}
|
统计
字数&阅读时间
至 hexo 根目录,安装 hexo-symbols-count-time :
1
|
sudo npm install hexo-symbols-count-time --save
|
至 hexo 的 _config.yml 添加:
1
2
3
4
5
|
symbols_count_time:
  symbols: true
  time: true
  total_symbols: true
  total_time: true
|
至 next 主题 的 _config.yml 修改:
1
2
3
4
5
6
|
symbols_count_time:
  separated_meta: <span style="color: red">true</span>
  item_text_post: true
  item_text_total: false
  awl: 5
  wpm: 200
|
hexo-reading-time 和 hexo-worcount 已经弃用。
站点访问量
直接配置 next 主题:
1
2
3
4
5
6
7
8
|
busuanzi_count:
  enable: <span style="color: red">true<?span>
  total_visitors: true
  total_visitors_icon: user
  total_views: true
  total_views_icon: eye
  post_views: true
  post_views_icon: eye
|
或者自己改文件:
在 /home/rachpt/blog/themes/next/layout/_partials/footer.swig 最后添加代码:
1
2
3
4
5
6
7
|
<script async src="https://dn-lbstatics.qbox.me/busuanzi/2.3/busuanzi.pure.mini.js"></script>
<div>
<i class="fa fa-user-md"></i>
本站总访问量:<span id="busuanzi_value_site_pv"></span> |
<i class="fa fa-eye"></i>
本站访客数:<span id="busuanzi_value_site_uv"></span>
</div>
|
头像旋转
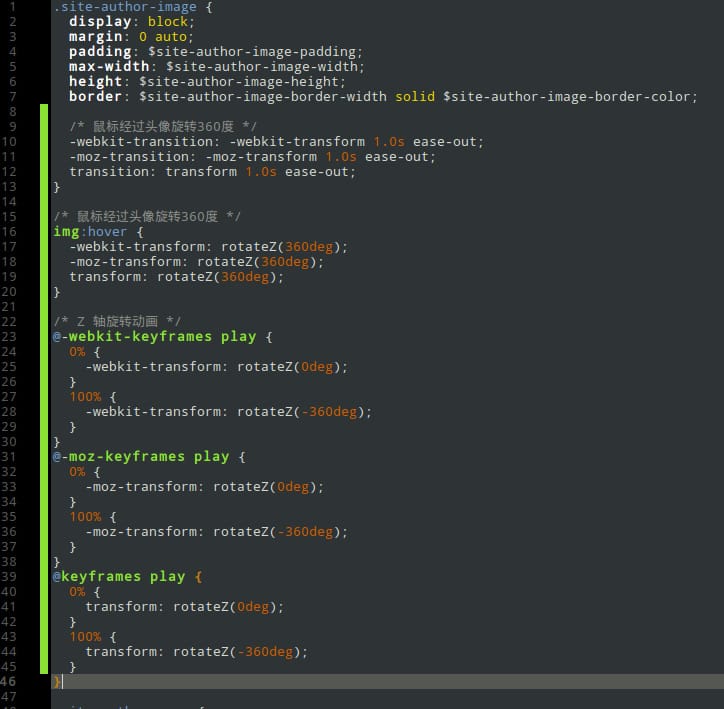
在\themes\next\source\css\_common\components\sidebar\sidebar-author.styl,里面添加如下代码:
 1
 2
 3
 4
 5
 6
 7
 8
 9
10
11
12
13
14
15
16
17
18
19
20
21
22
23
24
25
26
27
28
29
30
31
32
33
34
35
36
37
38
|
  /* 鼠标经过头像旋转360度 */
  -webkit-transition: -webkit-transform 1.0s ease-out;
  -moz-transition: -moz-transform 1.0s ease-out;
  transition: transform 1.0s ease-out;
}

/* 鼠标经过头像旋转360度 */
img:hover {
  -webkit-transform: rotateZ(360deg);
  -moz-transform: rotateZ(360deg);
  transform: rotateZ(360deg);
}

/* Z 轴旋转动画 */
@-webkit-keyframes play {
  0% {
    -webkit-transform: rotateZ(0deg);
  }
  100% {
    -webkit-transform: rotateZ(-360deg);
  }
}
@-moz-keyframes play {
  0% {
    -moz-transform: rotateZ(0deg);
  }
  100% {
    -moz-transform: rotateZ(-360deg);
  }
}
@keyframes play {
  0% {
    transform: rotateZ(0deg);
  }
  100% {
    transform: rotateZ(-360deg);
  }
}
|

添加 “本文结束”
创建。在路径 \themes\next\layout\_macro 中新建 post-end-tag.swig 文件,并添加以下内容:
1
2
3
4
5
6
7
|
<div>
  {% if not is_index %}
  <div style="text-align:center;color: #ccc;font-size:14px;">
    {# #}{ { __(theme.post_end_tag.contents) } }{# #}
  </div>
  {% endif %}
</div>
|
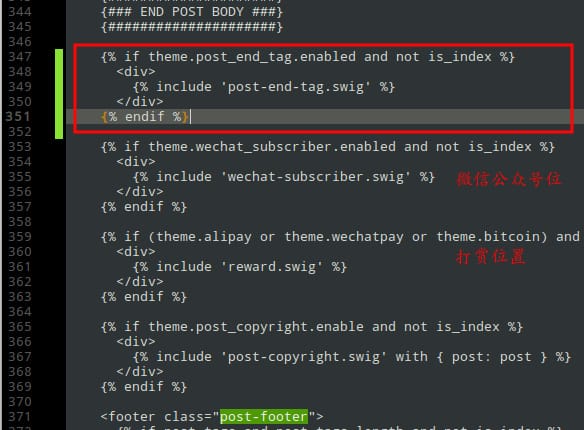
修改。接着打开\themes\next\layout\_macro\post.swig文件,在post-body 之后, post-footer 之前添加如下画红色部分代码。

1
2
3
4
5
|
    {% if theme.post_end_tag.enabled and not is_index %}
      <div>
        {% include 'post-end-tag.swig' %}
      </div>
    {% endif %}
|
参数。主题配置文件(theme/next/_config.yml)末尾添加:
1
2
3
|
post_end_tag:
  enabled: true
  contents: ---------本文结束<i class="fa fa-paw"></i>感谢阅读---------
|
内容可以自定义。本人参考 hexo 的 next 主题个性化配置教程 修改。
顶置
修改 hero-generator-index 插件,把文件:node_modules/hexo-generator-index/lib/generator.js 内的代码替换为:
 1
 2
 3
 4
 5
 6
 7
 8
 9
10
11
12
13
14
15
16
17
18
19
20
21
22
23
24
25
26
27
28
|
'use strict'
var pagination = require('hexo-pagination')
module.exports = function (locals) {
  var config = this.config
  var posts = locals.posts
  posts.data = posts.data.sort(function (a, b) {
    if (a.top && b.top) {
      // 两篇文章top都有定义
      if (a.top == b.top)
        return b.date - a.date // 若top值一样则按照文章日期降序排
      else return b.top - a.top // 否则按照top值降序排
    } else if (a.top && !b.top) {
      // 以下是只有一篇文章top有定义,那么将有top的排在前面(这里用异或操作居然不行233)
      return -1
    } else if (!a.top && b.top) {
      return 1
    } else return b.date - a.date // 都没定义按照文章日期降序排
  })
  var paginationDir = config.pagination_dir || 'page'
  return pagination('', posts, {
    perPage: config.index_generator.per_page,
    layout: ['index', 'archive'],
    format: paginationDir + '/%d/',
    data: {
      __index: true,
    },
  })
}
|
使用:(数值越大文章越靠前)
1
2
3
4
5
|
---
title:
date: 2018-03-05 19:37:08
top: #顶置
---
|
添加侧边栏音乐播单
-
下载所需文件:
长显+连续播放+右键音量控制 OR
长隐+连续播放
备用下载播放器 密码:oznd
-
设置 hexo 配置文件 _config.yml :
1
2
3
|
skip_render:
  - 404.html #跳过404页面
  - static/** #跳过static目录下的所有内容,注意是两个*号。
|
先复制 下载文件中的 四个文件夹至 source/static 。然后将 _my 文件夹移动到 /themes/next/layout 。
- 使所有页面都能播放,在
/themes/next/layout/_layout.swig 的 </body> 前添加
1
|
{% include '_my/audio.swig' %}
|

- 至
/themes/next/_config.yml 主题配置文件末尾添加:
 1
 2
 3
 4
 5
 6
 7
 8
 9
10
11
12
13
14
|
# music
audio:
  enable: true
  sources: [
  { title: '....',
    artist: '....',
    mp3: '......mp3',
    cover: '.....jpg' },

  { title: '.....',
    artist: '......',
    mp3: '.......mp3',
    cover: '.....jpg' }
  ]
|
其他:
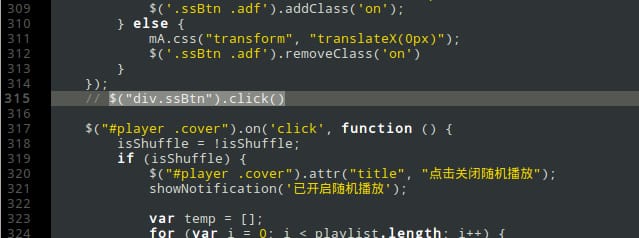
注释掉 source/static/js/player.js的$("div.ssBtn").click() ,播放器就不会一直弹出。

 1
 2
 3
 4
 5
 6
 7
 8
 9
10
|
source/static/js/player.js

var setProgress = function (value) {
    var currentSec = parseInt(value % 60) < 10 ? '0' + parseInt(value % 60) : parseInt(value % 60),
        ratio = value / audio.duration * 100;

    $('.timer').html(parseInt(value / 60) + ':' + currentSec);
+   localStorage.time = value //储音乐的播放状态
+   localStorage.song = currentTrack //储音乐的播放状态
}
|
sessionStorage.autoPlay = "true" 控制自动播放。
 1
 2
 3
 4
 5
 6
 7
 8
 9
10
11
12
13
14
15
16
17
|
var FirstLoad = function (i, time) {
  if (i == undefined) {
    i = 0
    currentTrack = 0
    shuffleIndex = 0
  }
  loadMusic(i)
  if (time) {
    audio.currentTime = time
  }
  if (localStorage.volume) {
    audio.volume = localStorage.volume
  }
  if (sessionStorage.autoPlay == undefined) {
    sessionStorage.autoPlay = 'true'
  }
}
|
设置 参考 。


